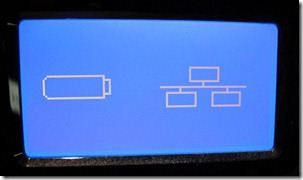
You may have accidentally erased your whole NAS drives or just been a victim of a software bug, but for a reason or another your Iomega NAS may have lost his firmware.

On theses devices, the firmware is located on the installed drives, not in an integrated flash memory on the device, so if you lose your drives data, you may as well lose the OS.
This product being in EOL (End Of Lifecycle) it’s very difficult to find resources about how to install the firmware again, plus theses devices were shipped with the drives and firmware installed.
From what I’ve found online, you have to reach to Lenovo directly to get a recovery software/solution for the NAS, but there is also several other solutions.
Warning : This is going to recover your Iomega device in working condition, this will not recover your drives data. This method also seems to not work for everyone so be advised.
First we need some tools and firmware to recover the NAS :
- Lenovo Iomega ix4-200d (Cloud or non cloud version)
- Two base hard drives to install the firmware on
- FAT 32 Formatted USB Drive
- The needed backup files (Files and mirrors linked)
Rodolfo & Braulio patched backup files
Older firmware backup : Mirror 1 – Mirror 2
First we need to prepare the drives, but with the recent updates, drives now needs to be initialised in GPT for larger capacity support, you also need to wipe them completely to erase any older partition data. To do that you can use your disk manager on MacOs, Windows and Linux.
Method 1 : Classic installation
Prepare your NAS, Remove every drives except the drives in the slot 1 and 2, they will be the targeted disks for the firmware install. Two disk are recommended to rebuild the raid group directly, but if the installation fails, you can try again with only one.
Make the bootable recovery USB, you first have to format your USB key to FAT 32, then extract the ix4-200d-recovery file to the USB support.
Install the firmware, Then, plug your USB key to the back, on the top USB port of the NAS. While pressing the NAS reset button, power on the NAS, keep holding for 60/70 seconds. The device will reboot. After the reboot logo showed up, you can release the reset button, watch for the hard drive blue activity light to see if you succeed.
Finish the installation, Wait for the firmware to do his business, it should take about 5 to 10 minutes, the unit should turn off and back up again, If it’s not turning on, start it manually. Keep the USB plugged until the usual interface shows up. Then shut it down, remove the USB drive and start it again !
You now should have a working NAS again ! Some updates may be available in the update tab as the firmware still not the most recent.
Method 2 : Physical installation
Follow the instructions of the instructions.txt file from the downloaded files (Specific hardware needed)
Special thanks to Rodolfo & Braulio for keeping upgrading this guide with their new patched firmware !

Laisser un commentaire