
In this article we are gonna setup a WSUS server to manage & accelerate the update process of Windows based computers.
What is a WSUS Server ?
WSUS stand for « Windows Server Update Services », it allows the centralization of Windows updates for an organization by downloading every selected updates from Microsoft on a local server, to allow a better distribution on local Windows clients when needed. It acts like a « Cache » service for Windows updates.
How does the WSUS service works ?
First the service needs to fetch the selected updates from Microsoft servers on a local storage support. Then the service makes itself available as a web server on ports 8530 HTTP & 8531 HTTPS to distribute the updates to Windows clients.
This service will also permit the selection of targeted clients in different groups to allow a munch better control of updates for the endpoints. The same goes for downloaded updates, it’s possible to choose which updates want to be downloaded or not for bandwidth and storage concerns. Some specifics updates & languages packs could be specified.
Setup
Prerequisites :
- Windows Server 2012 or greater
- Solid Internet Speed
- At least 250 Gb recommended
Now, let’s take the dive in the installation & the setup of the service.
I. Service installation
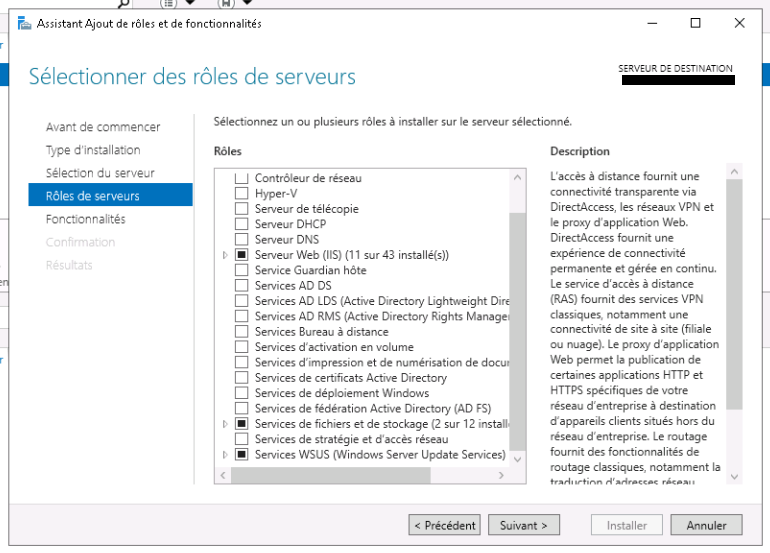
First things first, let’s install the service, on your Windows server, launch your Server Manager and go to : Add roles and functionalities > Install based on a role or functionality and tick the « WSUS Services » box. By ticking this case other needed components will be automatically installed too, our web server service (IIS) to distribute updates for instance.
When the installation ends, a restart could be necessary. A prompt for post installation will then show up as a notification, click on it and follow the instructions. See the informations below to insure that you do not miss any details.
II. Service configuration
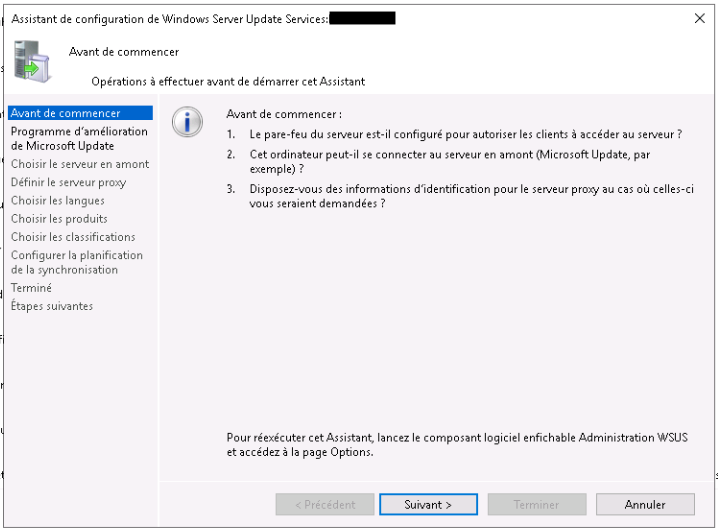
- Before starting : In this section, some sanity checks are asked to insure the good working condition of your service. Read the prompts carefully and adapt your topology.
- Improvement program : Basically telemetry, if you want information about your installs to be sent to Microsoft to improves their services, I recommend turning this off.
- Choose a download server : Here we can define the location from where we want to fetch our updates, an other WSUS server for instance or directly from Microsoft. For our first install, we will choose « From the internet » (Default).
- Proxy Server : If our organization use a proxy server and our WSUS server should get is traffic routed by this proxy, we need to specify that here.
- Choose the options :
Here, we can choose what do we want to keep in cache for the updates, for that there is 3 main categories.
- Languages
- Products
- Classifications
Select the categories carefully, each one can use a lot of storage and/or bandwidth for the initial download.
When you are done with the assistant, a first big Sync will start, if it’s not the case double check your settings or enable it manually. The server will sync is local storage with the remote Microsoft database.
III. Update management
The updates have to be manually approved by the administrator to be deployed on clients endpoints but it is also possible to define auto approval rules depending on several parameters.
To define a rule to auto approve every update we will head to the side menu Options > Automatic approbations > New rule we could the set the following rule :
Approve updates for every computer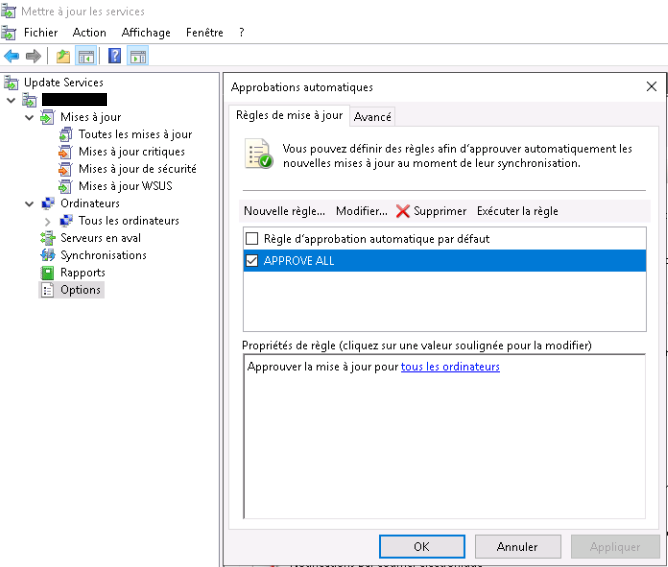
Creating groups can also permit a munch granular selection for updates. You can then deploy updates on a per group basis.
IIV. Client configuration
The service is now accessible from the network, to check that, we can go to the web page from which clients computers are gonna download updates from our WSUS. Open your browser and type ServerIP:8530 or ServerIP:8531 depending of your config.
If you get a white blank page as an answer, then your service is accessible, if you receive an HTTP Error code, double check your setting or re-run the WSUS configuration assistant.
To add clients, we need to specify them where to look for new updates. To achieve that we need to edit some values in the registry. Here we can define some parameters like the frequency of update checking, the WSUS server location (IP & Port or DNS Name) and more.
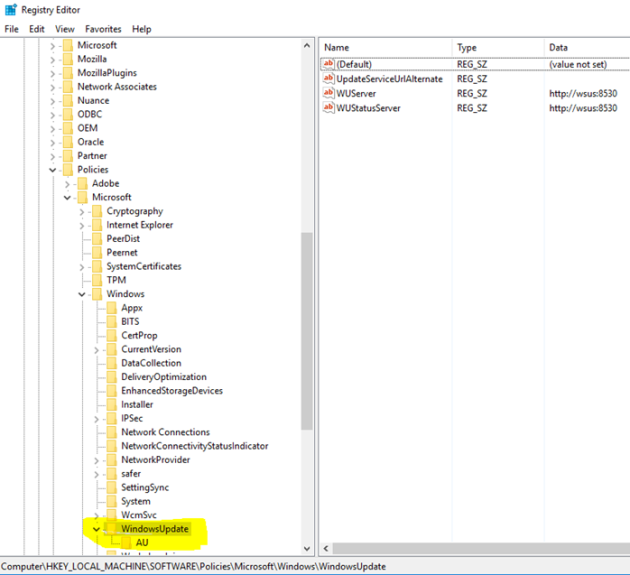
Refer to the picture for client configuration
The client configuration can be really hard to configure for a huge amount of clients, for that kind of setup a GPO (Group Policy Object) is strongly advised for large-scale deployment.
IV. Client configuration (GPO)
To deploy our setup in an organization at large scale, we are gonna use a GPO. To test it, let’s create an OU (Organizational unit) first, i’m gonna call mine « WSUS ».
Then we need to use the settings located in Strategies > Administration templates > Windows components > Windows update
Here you can edit every possible settings for the windows clients.
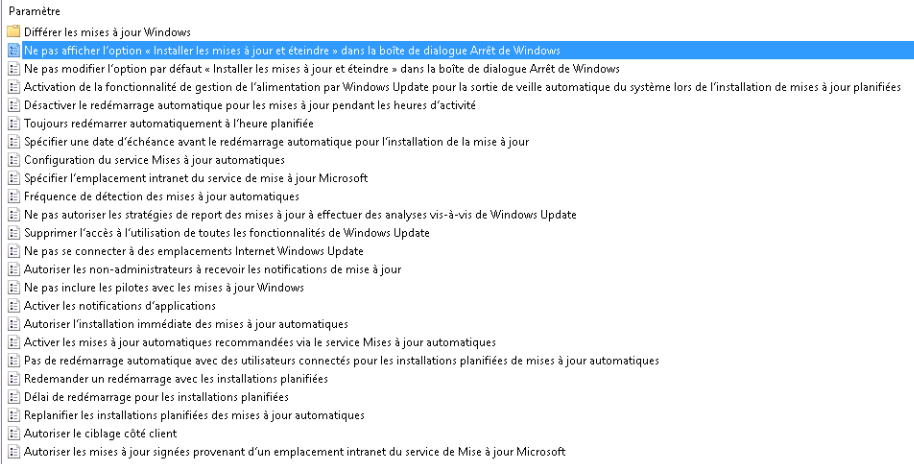
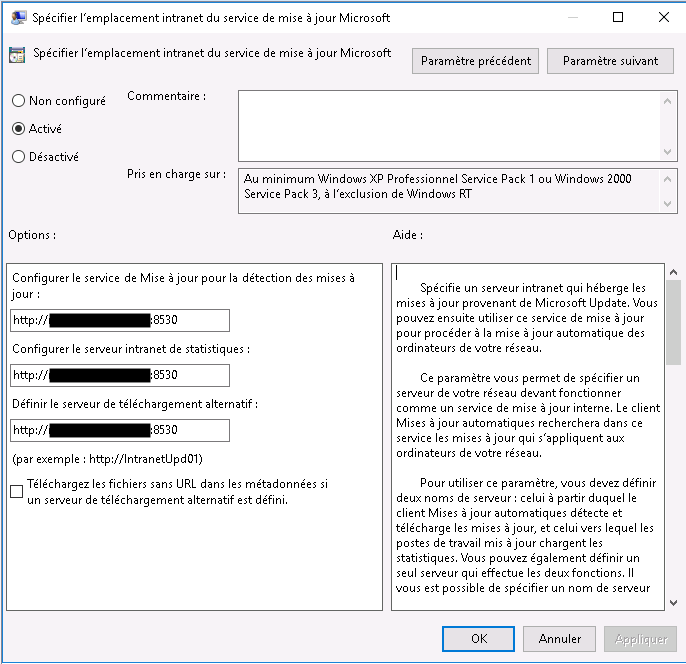
Only one option is mandatory to establish the connection between the service and the client : « Specify the intranet location of the Microsoft update service ».
To insure that the rule is applied you can type the following command in the client CMD.
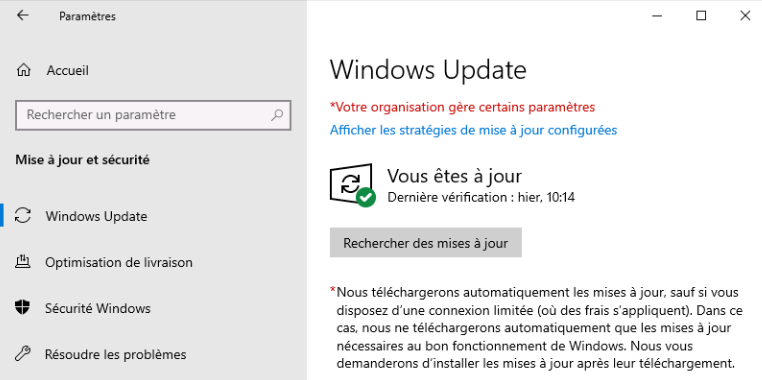
gpupdate /forceLet’s get back to the Windows update setting tab on our client and check if a red message is present. If it’s the case your GPO as been applied and your windows update settings too !
*Your organization manage some parameters
Your updates will now be applied for all of your clients with your selected parameters ! Hope this post was helpful.
Laisser un commentaire